Gimpster & His Boring Blog
Making all other blogs seem exciting!

-
Azure AD Domain Services for Linux authentication
Posted on November 23rd, 2019 No commentsNOTE: I do not mean for this to be an exhaustive guide on how you should implement security on your *nix infrastructure, so make sure you’ve thought this out. There are also some larger Azure AD design considerations you should research more before proceeding as well.
A customer with on-premises Active Directory infrastructure syncing to Azure Active Directory (AAD from here on), for Office 365 primarily, wanted to enable AD authentication on their *nix systems in Azure. The customer was adamant they did not:- want to deploy/pay for any Windows systems if it could be avoided
- want the *nix infra reaching back over the VPN to on-prem
- want to deploy any 3rd party software (ie: Centrify, or something like that)
- want to deploy a shadow OpenLDAP+Kerberos system
To fulfill these requirements, enter stage right: Azure AD Domain Services.
This would be a new adventure for me, since most people have/are willing to deploy windows in Azure. This tool essentially provides, what amounts to, read-only Domain Controller services without the overhead of a Windows operating system. It then synchronizes (ONE-WAY!!!) from AAD, which is being fed from the on-premises AD infra. You should read the docs more, but while its a one-way push, you can do some things like create OU’s and other fun stuff… but thats way out of scope from the spirit of this post.1.) The first step down this road is to deploy Azure AD Domain Services (lets shorten this to from here on to ADDS). There are some things to consider here, and as stated, I am not going to be exhaustive. At the time of this writing, it would appear you can only have one ADDS per tenant, so think long and hard about where you decide to site this.
Some things I had to think about and decisions I made when I spun ADDS up (just as a small example):- Where is my customer primarily hosting their VM’s? (US Central)
- Do I want to put it inside its own Virtual Network? (YES)
- Review firewall configuration required.
- Create peering from *nix machine Virtual Networks to the ADDS Virtual Network.
- Change subnets the *nix machines run in to use ADDS for DNS.
- Do I have any strange/internal DNS considerations to worry about? (Thankfully, NO)
- Will the customer want to administer ADDS beyond the Azure console in the cloud? (Thankfully, NO. Otherwise they would HAVE to deploy a Windows machine in Azure, see: https://aka.ms/aadds-admindomain)
After thinking about those, and many other things, ADDS spun up without drama in about 30 minutes. I then did some of my prerequisite DNS changes in various subnets.
2.) The next obvious step is, configure the *nix machines to use this new ADDS functionality you deployed. Here is a very rough guide on how I did this. Again, there is so much nuance to this… you really need to plan this out and lab it up like any SSO project. This is bare bones as it gets here.
2a.) Reconfigure the machine to use the new ADDS DNS ip’s. In my case, the machines were all using DHCP so nothing to do except bounce the lease. If you are managing DNS outside of DHCP, you will have o “do the thing” with nmcli, resolv.conf… whatever applies to your environment.
2b.) Install the necessary packages. In my demo, I’m on CentOS 7.x:
# yum install -y realmd oddjob oddjob-mkhomedir sssd samba-common-tools adcli krb5-workstation
2c.) Configure the machine to use ADDS:
We have a couple different paths we can take here: realm or adcli. In my case, realm as A-OK for my use case. XXXXX == being ADDS name of course.
[root@XXXXXX-www01 ~]# realm join XXXXXX.onmicrosoft.com -U adminuser@XXXXXX.ONMICROSOFT.COM -v
* Resolving: _ldap._tcp.XXXXXX.onmicrosoft.com
* Performing LDAP DSE lookup on: 10.0.3.5
* Successfully discovered: XXXXXX.onmicrosoft.com
Password for adminuser@XXXXXX.ONMICROSOFT.COM:
* Required files: /usr/sbin/oddjobd, /usr/libexec/oddjob/mkhomedir, /usr/sbin/sssd, /usr/bin/net
* LANG=C LOGNAME=root /usr/bin/net -s /var/cache/realmd/realmd-smb-conf.RQ0NB0 -U adminuser@XXXXXX.ONMICROSOFT.COM ads join XXXXXX.onmicrosoft.com
Using short domain name — XXXXXX
Joined ‘XXXXXX-WWW01’ to dns domain ‘XXXXXX.onmicrosoft.com’
* LANG=C LOGNAME=root /usr/bin/net -s /var/cache/realmd/realmd-smb-conf.RQ0NB0 -U adminuser@XXXXXX.ONMICROSOFT.COM ads keytab create
* /usr/bin/systemctl enable sssd.service
Created symlink from /etc/systemd/system/multi-user.target.wants/sssd.service to /usr/lib/systemd/system/sssd.service.
* /usr/bin/systemctl restart sssd.service
* /usr/bin/sh -c /usr/sbin/authconfig –update –enablesssd –enablesssdauth –enablemkhomedir –nostart && /usr/bin/systemctl enable oddjobd.service && /usr/bin/systemctl start oddjobd.service
* Successfully enrolled machine in realmAt this point, unless you want to fully qualify your users, you might want to edit your /etc/sssd/sssd.conf and change use_fully_qualified_names to: False and then restart the sssd daemon.
3.) At this point, if all has gone well, you should be able to see the user objects & groups which have flowed from on-prem to ADDS:
[root@XXXXXX-www01 ~]# id testuser
uid=691801111(testuser) gid=691800513(domain users) groups=691800513(domain users),691801104(aad dc administrators),691801113(linux-sudo_all),691800520(group policy creator owners),691801102(dnsadmins),691800572(denied rodc password replication group)[root@XXXXXX-www01 ~]# groups testuser
testuser : domain users aad dc administrators linux-sudo_all group policy creator owners dnsadmins denied rodc password replication groupAt this point, … time to start configuring things like your allowed ssh groups, sudoers … all that fun stuff. Extra points if you manage your SSH keys in a secure and automated fashion as well for another layer of security.
Some final thoughts:
If you’ve used Azure AD Connect, you know there can be lag issues for the impatient. ADDS adds yet another layer into the mix. On top of everything else, you’re now waiting for AAD to synchronize into ADDS too. So between on-prem -> AAD -> ADDS … it can be a while for changes/new objects to become a reality. Keep this in mind, and if this is a non-starter for you… look for another solution.
This customer pretty much doesn’t even allow interactive access to their production *nix infra (a good thing!), so this was really just needed for the basics if the … you know what … hit the fan.
My customer was a small shop, so the pricing worked out to be about (at the time of this post) around $110/mo for ADDS. They considered this a huge win over a Windows VM + the overhead of managing and securing it.Til next time…
-
Outlook 2016 constantly prompts for password on first start with Azure AD / Office 365
Posted on June 3rd, 2019 No commentsHey folks,
After many years since my last, I’m doing yet another Office 365 migration. I’m fortunate that everyone is on Outlook 2016 and Windows 10… not too much legacy baggage there. This time around, I’m using Azure AD Sync + Pass-through authentication. The last migration I did, this functionality wasn’t even available.. I had to use Okta and then eventually OneLogin to accomplish my goals.
At first, everything seemed to be working fine, no password prompts using OWA with IE/Edge and Chrome. This was all good for me, since I tend to use OWS 100% when I’m on Office 365.
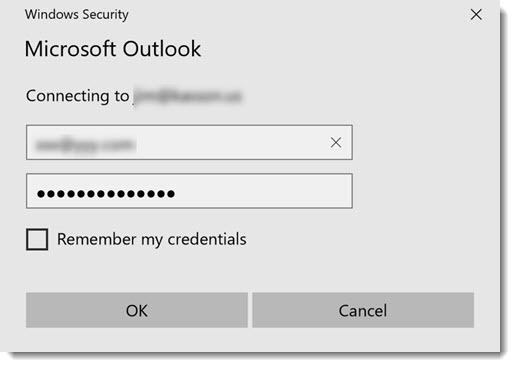
SADLY: Outlook itself was prompting for a password on first start / launch. The dreaded Outlook credential begging window in all its glory:
I went back through the manuals, looked at all of my Azure AD config… couldn’t figure it out. In my desperation, I ran across this blog: Jaap Wesselius: Single Sign-On and Azure AD Connect Pass-Through Authentication
The key step I missed (or didn’t know about?):
Set-OrganizationConfig -OAuth2ClientProfileEnabled:$true
After enabling that, I was immediately in business and no more password prompting from Outlook! Hopefully this helps someone, because this is yet another dark alley I see a lot of people struggling through.
Til next time…
-
Making Datadog report mount points vs. device names
Posted on March 10th, 2015 No commentsThis will seem like a really dumb post, but I scratched my head on this for a bit. I really wanted my Datadog storage dashboards to report mount point name vs. device names. I couldn’t really find much help within Datadog’s documentation either.
After going down a few paths, I bumped into this in the datadog.conf:
# Use mount points instead of volumes to track disk and fs metrics

use_mount: no
I changed that over to yes, and boom … problem solved!
-
Hybrid Office 365: new cloud users are missing from the hybrid / on-premises address book
Posted on November 25th, 2013 No commentsHi everyone,
Like many other people, I’m in the process of retiring an on-premises Exchange 2007 platform to Office 365. We’re using DirSync+ADFS, but not in rich coexistence mode.
I ran into a situation today where a net-new user had been created in Active Directory Users & Computers, and then subsequently had Exchange licenses assigned manually in the 365 admin portal. This is in contrast to using the EMC or PowerShell to create a “remote mailbox” proceedure. All was well for the user, except for the fact they were not being included in the on-premises address book.
I did some research and comparisons, and it came down to adding this attribute with ADSIedit. Now keep in mind, these are just an example. Make sure you look at a user in YOUR organization to come up with the right DN’s to add!
CN=All Users,CN=All Address Lists,CN=Address Lists Container,CN=Example Company,CN=Microsoft Exchange,CN=Services,CN=Configuration,DC=exampledomain,DC=local
CN=Default Global Address List,CN=All Global Address Lists,CN=Address Lists Container,CN=Example Company,CN=Microsoft Exchange,CN=Services,CN=Configuration,DC=exampledomain,DC=local
After adding those to the user, I forced an address book update and they magically appeared! I found a few threads on the Office 365 support forum on how to fix this, but this method I came up with was by FAR the easiest. I saw some people proposing dumping the whole DirSync’d user list to a csv and doing all sorts of crazy kung fu on it. I guess if you had made this mistake on a wide scale that is the proper way to think about it.
I’m also told that if we were in rich coexistence mode and moved the OAB to the hybrid Exchange 2010 box, this would also solve any issues.
Til next time…
-
What’s new in vSphere 5.5
Posted on August 26th, 2013 No commentsAnother VMworld is upon us, and once again I’m not attending. The big irony in 2013: I LIVE in the host city!
Anyway, for all the people slaving away at work (no doubt on a VMware product) like me… this one’s for you:
-
EMC Avamar Windows Server 2008 R2 VSS backup fails with: System Writer is not present
Posted on July 11th, 2013 No commentsWelcome back everyone,
Today’s random backup failure is brought to you by the number: infinity. Well, thats how many .NET temp files I seemed to have on a server that refused to complete its VSS backup.
On this particular SharePoint 2010 machine, when a VSS backup would run it bombed with this error:
2013-07-11 18:04:50 avvss Info : VSS: Creating vss version 6.0 or greater object
2013-07-11 18:04:50 avvss Info : Gathering writer metadata…
2013-07-11 18:04:51 avvss Error : Can not continue disaster recovery backup because the System Writer is not present, exiting.
2013-07-11 18:04:51 avvss Info : Final summary generated subwork 0, cancelled/aborted 0, snapview 0, exitcode 536870919
2013-07-11 18:04:56 avvss Info : uvss returning with exitcode 536870919I tried all of the usual VSS writer DLL re-register & permissions fix tricks I knew (which technically aren’t recommended on Server 2008 R2!), but alas nothing would bring the System Writer back. Becoming almost apathetic about the issue, I then bumbled onto this TechNet Social post.
It gets interesting about halfway down with a post from “Rosaceae” & “Microbolt”. I’ve quoted their discussion below, should that link ever die.
I checked out my .NET Framework temp directories, and there were about 100k files in there going back to 2009. I cleaned them out, restarted the Cryptographic Service and wouldn’t you know it, the VSS System Writer came back and my backup was successful!
By the way, the Cryptographic Service is probably about the most unintuitive service name that could relate to a VSS component Microsoft could think of.
I’m going to keep my eye on this and see if I end up needing to relocate my .NET Framework temp files like Microbolt did, but I’m guessing not. It looked as if some developer was trying out some new/bad code and caused it.
So thanks to both of those people, I would’ve been stumped without it.
Till next time…
Hi,
I’ve got this problem about a month ago. I refer to MSP.
The problem was caused due to stack full. When we list system writer using “vssadmin list writers”, it will go through all the system files. To do that, the OS use a search algorithm with a stack which has a size limitation of 1000. When the stack was full, it failed to continue listing files and log an event in the application event log.
In my case, the following folder contains too many subdirectory and caused the problem.
C:\Windows\Microsoft.Net\Framework64\v2.0.50727\Temporary ASP.NET Files\*
1. Open C:\WINDOWS\Microsoft.NET\Framework64\v2.0.50727\CONFIG\Web.config
2. Add tempDirectory attribute to compilation tag. For example:
< compilation tempDirectory=”c:\ASPTEMP”>
And also grant the folder with the same privilege with as “C:\Windows\Microsoft.Net\Framework64\v2.0.50727\Temporary ASP.NET Files”.
3. Restart the IIS Service.
4. Backup and delete all files under “C:\Windows\Microsoft.Net\Framework64\v2.0.50727\Temporary ASP.NET Files”.
5. restart the Cryptographic Service.
6. Try “vssadmin list writers” again.
Hopes this brings idea for you to solve it.Thanks Rosaceae!
After going on a wild goose chase setting permissions and nothing working I got looking around in the .Net Folders per your advice. It looks like in my case I had the same issue with you except in the Framework instead of Framework64 (as most of my web apps are running x86).
I’ll share what I did incase it helps anyone (Ignore that last two of each step if you don’t have .Net 4.0 Installed):
Created 4 Folders:
C:\Asp.net Temp Files\2.0.50727\x86
C:\Asp.net Temp Files\2.0.50727\x64
C:\Asp.net Temp Files\4.0.30319\x86
C:\Asp.net Temp Files\4.0.30319\x64
Set Permissions on the folder (This is how I set them, may be different on your server. Check existing “Temporary ASP.NET Files” directory for permissions on your server
icacls “c:\Asp.net Temp Files” /grant “BUILTIN\Administrators:(OI)(CI)(F)”
icacls “c:\Asp.net Temp Files” /grant “NT AUTHORITY\SYSTEM:(OI)(CI)(M,WDAC,DC)”
icacls “c:\Asp.net Temp Files” /grant “CREATOR OWNER:(OI)(CI)(IO)(F)”
icacls “c:\Asp.net Temp Files” /grant “BUILTIN\IIS_IUSRS:(OI)(CI)(M,WDAC,DC)”
icacls “c:\Asp.net Temp Files” /grant “BUILTIN\Users:(OI)(CI)(RX)”
icacls “c:\Asp.net Temp Files” /grant “NT SERVICE\TrustedInstaller:(CI)(F)”
Add tempDirectory attribute to compilation tag. This will keep you from having the problem again in the future. Add the following attribute to these files:C:\WINDOWS\Microsoft.NET\Framework\v2.0.50727\CONFIG\Web.config
C:\WINDOWS\Microsoft.NET\Framework64\v2.0.50727\CONFIG\Web.config
C:\WINDOWS\Microsoft.NET\Framework\v4.0.30319\CONFIG\Web.config
C:\WINDOWS\Microsoft.NET\Framework64\v4.0.30319\CONFIG\Web.config
Restart IIS so that it will use the new Temp Directory
iisreset
Deleted old Temp Files
rmdir /s /q “C:\Windows\Microsoft.Net\Framework64\v2.0.50727\Temporary ASP.NET Files\root”
rmdir /s /q “C:\Windows\Microsoft.Net\Framework\v2.0.50727\Temporary ASP.NET Files\root”
rmdir /s /q “C:\Windows\Microsoft.Net\Framework64\v4.0.30319\Temporary ASP.NET Files\root”
rmdir /s /q “C:\Windows\Microsoft.Net\Framework\v4.0.30319\Temporary ASP.NET Files\root”
Restart Cryptographic Service
net stop cryptsvc
net start cryptsvc
Now if all goes well you should be able to see the “System Writer” again!
vssadmin list writers -
Making VMware Update Manager 5.1.1 (and 5.5) work with SQL 2012
Posted on May 24th, 2013 No comments06/07/2013 – UPDATE: A reader commented, and this is still an issue with 5.1.1a.
11/25/2013 – UPDATE: Thanks to user comments, VMware has finally published a KB to this issue: http://kb.vmware.com/kb/2050256 also users report (as does the KB) this is an issues on 5.5.
My lab was getting pretty dirty, so I thought why not start from scratch with vSphere 5.1.1. I figured it was also a great time to refresh my old lab SQL Failover Cluster with Server 2012 and SQL 2012 too. I had been wanting to play with AOAG and the other new(er) toys 2012 had to offer anyway.
From what I can tell, technically vSphere is officially supported on SQL 2012??? Being the rebel I am, I pressed on undeterred by a support matrix anyway.
Everything went as planned during the vSphere Install, and I was pretty happy. Then it came time to get Update Manager working. I installed it as usual, creating the required 32-bit DSN using the SQL 11.0 native client (what comes with SQL 2012). It installed normally and worked for about 3 minutes. Then the Update Manager service started to die repeatedly. I checked out the logs in C:\ProgramData\VMware\VMware Update Manager\Logs, and I saw this:
mem> 2013-05-24T14:18:25.299-07:00 [02472 info ‘VcIntegrity’] Logged in!
mem> 2013-05-24T14:18:25.611-07:00 [03288 error ‘Default’] Unable to allocate memory: 4294967294 bytes
mem> 2013-05-24T14:18:25.720-07:00 [03288 panic ‘Default’] (Log recursion level 2) Unable to allocate memoryI was like oh, some sort of Java nonsense. I tinkered around a bit, looked in the VMware KB and Google. Nothing really seemed to help.
I started to wonder if SQL was the issue, so I bumped the Update Manager DB down to 10.0/SQL 2008 compatibility mode…. no joy. Then I installed the 10.0 native client from SQL 2008 R2 media, and recreated the 32-bit DSN. I started Update Manager back up and BAM …it seems to be stable for a couple days now.
If this wasn’t a lab I’d call VMware to complain, but alas it is lab. looked through the 5.1.1 release notes, and I don’t see anything about this? For the record, all other portions of vSphere worked fine with 11.0 native client, including SSO.
Till next time…
-
EMC Avamar RMAN backup fails with: RMAN-06403, ORA-01034 and ORA-27101
Posted on April 24th, 2013 No commentsHello folks,
I had a really interesting (to me) Avamar RMAN backup failure after a system was rebooted. The system had been backing up perfectly for months, and then all of the sudden:
Recovery Manager: Release 11.2.0.3.0 – Production on Wed Apr 24 13:59:45 2013
Copyright (c) 1982, 2011, Oracle and/or its affiliates. All rights reserved.
RMAN> @@RMAN-blahblah-1543-cred1.rman
2> connect target *;
3> **end-of-file**
4> run {
5> configure controlfile autobackup on;
6> set controlfile autobackup format for device type sbt to ‘CONTROLFILE.blahblah.%F’;
7> allocate channel c0 type sbt PARMS=”SBT_LIBRARY=/usr/local/avamar/lib/libobk_avamar64.so” format ‘%d_%U’;
8> send channel ‘c0’ ‘”–libport=32110″ “–cacheprefix=blahblah_c0” “–sysdir=/usr/local/avamar/etc” “–bindir=/usr/local/avamar/bin” “–vardir=/usr/local/avamar/var” “–logfile=/usr/local/avamar/var/Oracle_RMAN-blahblah_Group-1366836935662-5002-Oracle-blahblah-avtar.log0” “–ctlcallport=32108″‘;
9> allocate channel c1 type sbt PARMS=”SBT_LIBRARY=/usr/local/avamar/lib/libobk_avamar64.so” format ‘%d_%U’;
10> send channel ‘c1’ ‘”–libport=32110″ “–cacheprefix=blahblah_c1” “–sysdir=/usr/local/avamar/etc” “–bindir=/usr/local/avamar/bin” “–vardir=/usr/local/avamar/var” “–logfile=/usr/local/avamar/var/Oracle_RMAN-blahblah_Group-1366836935662-5002-Oracle-blahblah-avtar.log1” “–ctlcallport=32108″‘;
11> backup database plus archivelog delete input;
12> }
13>
connected to target database (not started)
using target database control file instead of recovery catalog
RMAN-00571: ===========================================================
RMAN-00569: =============== ERROR MESSAGE STACK FOLLOWS ===============
RMAN-00571: ===========================================================
RMAN-03002: failure of configure command at 04/24/2013 13:59:45
RMAN-06403: could not obtain a fully authorized session
ORA-01034: ORACLE not available
ORA-27101: shared memory realm does not exist
Recovery Manager complete.Sorry for the craptastic formatting there, gotta love Oracle’s gigantic errors 🙂
Being the type of guy who tries to figure things out myself, …I did the usual and checked support.emc.com, legacy Powerlink and of course Google. In my search, I came up with this EMC KB article: esg130176. It stepped me through making sure the instance was running and that the tnsnames.ora & /etc/oratab were correctly formatted.
All of this seemed to check out, and I was even able to perform a manual RMAN backup to local disk, which boggled me further.
I tried to get our DBA’s to help out, but got the usual “everything looks good on our side” answer.
I resigned myself to creating an SR with EMC. The gentleman who returned my call took a quick look and immediately knew what was wrong. He mentioned that when he originally discovered this issue for another customer, it had taken a while to figure out what was going on.
Somehow since the last restart, someone had managed to add a / to the end of oracle’s ORACLE_HOME environment variable:
$ whoami
oracle
$ env |grep ORACLE_HOME
ORACLE_HOME=/u01/app/oracle/product/11.2.0/dbhome_1/Avamar apparently strips off that erroneous trailing / as it sets its own ORACLE_HOME when it starts the job and thus breaks sqlplus, rman… all of the those tools we so dearly need.
I want my DBA’s to fix that environment variable, but that would require restarting this production database. To work around this, create a file called /usr/local/avamar/var/avoracle.cmd and put this inside it. This will FORCE Avamar to tack on the /.
–orahome=/u01/app/oracle/product/11.2.0/dbhome_1/
Obviously you need to make that match YOUR environment!
Try the backup again, and with any luck you’ll be “fixed”! I suggested to the EMC support engineer that he should add that to the above mentioned KB article, and he said he would do that.
Till next time…
-
The Long Goodbye
Posted on January 2nd, 2013 No commentsWith many things I once knew quickly fading into the distance, I thought it quite poignant to record how I even arrived in Iowa.
In 2001 I worked a small .com in Delray Beach, FL. Things weren’t perfect, but it seemed like we’d be able to weather the post-bubble financial storm. I lived in Boca Raton with a buddy, and didn’t have many cares.
In early September I took a few days of vacation and traveled to New York City to buy a 1996 Honda Civic from a friend. I hung out for my birthday, and then proceeded on to Reston, VA for an interview at AOL (of all places). I didn’t really want to work in Northern Virginia, so I didn’t take the interview very seriously. Mostly I just hung out with an old IRC buddy who worked at AOL and cruised around in his Ferrari.
After the interview I drove all night to get back to South Florida. As I was about to pass through Jupiter, I first learned of the 9/11 attacks from Power96 (people from SFL know what radio station I mean!). I recall it being surreal getting that news from renowned Miami Bass/Booty Music maestro DJ Laz.
I drove to the office first, since it was nearest to me, and everyone was in the conference room watching the events unfold. This will sound bad, but as I watched the towers fall… I knew the company was finished. Most of our funding was via NYC venture capital, and it goes without saying they got spooked. September 14th … I was officially on the breadline.
I know it’ll come as a great surprise, but at age 22 I wasn’t very strategic with money. I had bigscreen TV(s), arcade games, motorcycles, multiple cars and maybe… $500 cash to my name. I applied for unemployment, but the maximum monthly amount was $1250 at that time. Just my share of the rent consumed 75% of that. I tried to find work in South Florida for two months, but was unsuccessful.
In an act of desperation, I applied for a job I saw listed in Des Moines, IA. Really long-story-short, I had lived in Iowa for 8 months in 1998 with my parents. I recalled it being a decent enough place, and since I had nothing to eat … what the hell. It was a 6 month contract, and the phone screen went well. About an hour after the screen the hiring manager told me if I could be in Iowa Monday, I had the job. This was on Wednesday afternoon.
I packed what I could into my 1995 Ford Mustang GT, and set off for Iowa. I was just sure I’d be back “home” when I had some money saved up.
11 years later, I now find myself finally departing Des Moines. It’s interesting how the best laid plans turn into almost a third of your life. I’m not really sure what to expect, but I really do hope for the best. I’ve never really felt completely “at home” here, but so many formative years and memories happened.
I’ll end with a quote from Doc Brown: Your future is what you make it. So make it a good one, both of you!
Here’s hoping for a great 2013 and beyond.
-
Configuring impersonation for use with Veeam Exchange Explorer.
Posted on November 21st, 2012 No commentsSo, … you just got your Veeam platform upgraded to 6.5, and now you’re ready to use Exchange Explorer to do some item level recovery hotness. You choose the “Restore to …” option and POW you get this error:
“The account does not have permission to impersonate the requested user.”

I’m not much of an Exchange engineer anymore, but I remembered something like this in Exchange 2007 when you wanted to do item level restore with EMC Avamar. To get past this, you must grant the account you’ve launched the Veeam managment console with the ability to impersonate the target user.
This is easily accomplished with the following Exchange Managment Shell command:
New-ManagementRoleAssignment -Name:impersonationAssignmentName -Role:ApplicationImpersonation -User:enter_your_account_here
If this is a role you’re not comfortable leaving enabled on this account, you can quickly remove it with this command:
Get-ManagementRoleAssignment | Where {$_.Role -eq “ApplicationImpersonation” -and $_.RoleAssigneeName -eq “enter_your_account_here“} | Remove-ManagementRoleAssignment
It’s also possible to this on a PER mailbox if you really want, but I’d just reccomend keeping this managment role enabled on your Veeam service account.
As a side note…. Exchange Explorer is a pretty amazing plug-in for Veeam 6.5. The features they continue to develop on this software is amazing, especially when you consider its price point.
Til next time…
